This guide is a quick introduction on the different features in the Dise CX Portal and how you as a user can navigate and use these features to your advantage.
TABLE OF CONTENTS
User-related settings
In the top right corner, user-related settings can be found. Clicking the user avatar brings up a menu where to set password and details, and if various menus in Portal should be visible.
The language selector shows all supported languages.
The question mark icon is a help function which lights up if you are in a dialog which offers contextual help. Clicking this icon will open a new dialog next to the one you are in with some helpful tips.

Menus, dialogs
To the left in Portal the main menu is located. Clicking a menu item opens a dialog to the right. Dialogs in turn can open up new dialogs which appear to the right of existing ones. Closing a dialog can be done using the X icon in the top right, or by hitting the Escape key.
Generally, buttons are blue, with the exception of save buttons which are green to stand out and delete buttons which are red, also to stand out.
Context menus
Many items have further options that are not immediately visible. These can be found under the Tools icon which is located in the top right corner.
Clicking it will show a context menu with icons.

Searching, sorting, selecting
Various lists make up a large part of the data in Cloud, lists of content, players or licenses. Lists come with a set of tools to sort, filter and select multiple list items, located at the top of the list.
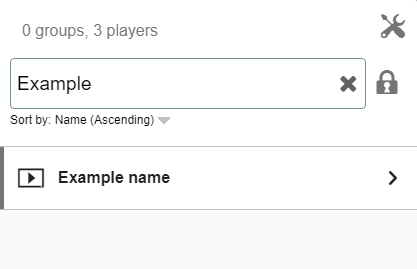
The default sort is by name. To change the sort order, click the arrow next to "Sort by: ".

Type a search/filter term in the search field to filter out only those list items that matches the term.
Click the X icon in the search field to clear the filter.
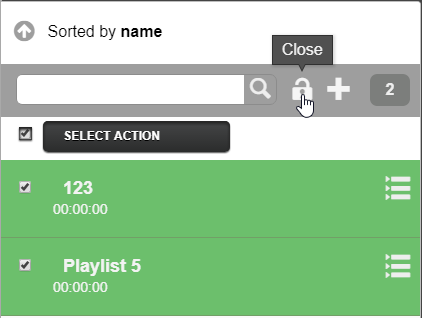
To be able to edit multiple items in a list, click the padlock icon.
The list will change appearance to allow to select single or multiple items.
Click the checkbox at the top to select All or None.

You can select an item in the list by simply clicking the item or checking the box.

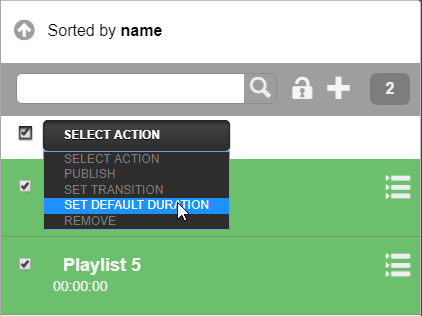
With one or more items selected, select from the drop-down one of a number of actions that are applied to all selected items.
This can be used to easily change the playing content, or to change schedule for a large number of items at once.
You may also drag-and-drop items while in this mode, to drag players into a group, for example.

To exit the edit mode, click the padlock icon again.
Tabs
In the left menu bar, click an item to enter its tab.
Overview
This guide is a quick introduction on the different features in the Dise CX Portal and how you as a user can navigate and use these features to your advantage.
TABLE OF CONTENTS
User-related settings
In the top right corner, user-related settings can be found. Clicking the user avatar brings up a menu where to set password and details, and if various menus in Portal should be visible.
The language selector shows all supported languages.
The question mark icon is a help function which lights up if you are in a dialog which offers contextual help. Clicking this icon will open a new dialog next to the one you are in with some helpful tips.
Menus, dialogs
To the left in Portal the main menu is located. Clicking a menu item opens a dialog to the right. Dialogs in turn can open up new dialogs which appear to the right of existing ones. Closing a dialog can be done using the X icon in the top right, or by hitting the Escape key.
Generally, buttons are blue, with the exception of save buttons which are green to stand out and delete buttons which are red, also to stand out.
Context menus
Many items have further options that are not immediately visible. These can be found under the Tools icon which is located in the top right corner.
Clicking it will show a context menu with icons.
Searching, sorting, selecting
Various lists make up a large part of the data in Cloud, lists of content, players or licenses. Lists come with a set of tools to sort, filter and select multiple list items, located at the top of the list.
The default sort is by name. To change the sort order, click the arrow next to "Sort by: ".
Type a search/filter term in the search field to filter out only those list items that matches the term.
Click the X icon in the search field to clear the filter.
To be able to edit multiple items in a list, click the padlock icon.
The list will change appearance to allow to select single or multiple items.
Click the checkbox at the top to select All or None.
You can select an item in the list by simply clicking the item or checking the box.
With one or more items selected, select from the drop-down one of a number of actions that are applied to all selected items.
This can be used to easily change the playing content, or to change schedule for a large number of items at once.
You may also drag-and-drop items while in this mode, to drag players into a group, for example.
To exit the edit mode, click the padlock icon again.
Tabs
In the left menu bar, click an item to enter its tab.
Overview
On the Overview tab you can Publish changes and see if there are players with errors.
Players
On the Players tab all Lite or Premium players and player groups in the network are listed.
You can see immediately if a player or player group has a problem by its color. A green color means everything is OK. A red color means something is wrong that needs your attention. A grey color means it is not active (not "attached" to a physical device).
Click the buttons below to Create new players or groups.
Clicking a player shows a screenshot of what the player is currently playing and lets you edit the Player settings.
Players / playlists - what is the difference?
Playlists
On the Playlists tab, all the playlists in the network are listed. Playlists are connected to players and are sequences of media content.
Change playlist for a player
Players / playlists - what is the difference?
Layouts
Layouts are connected to players and lets you place playlists into zones or layers on the screen. It makes it possible to have your logotype on top of all content at all times or put a weather feed on one side of the screen.
Change layout for a player
Content Library
On the Content Library tab you may view and upload media files, and create web page items.
By selecting a file you can view more information about the item, like file size and when it was last updated.
Schedules
On the Schedules tab you have the option to create named schedules. They can be used for several playlists which simplify if you have a lot of playlists that you want to configure to be active for example only during the opening hours. Named schedules are also useful when you have occurring events, as they can contain several sub-schedules.
Reports
The Reports tab lets you produce reports about what content that has been shown on which screen and at what time.
System
The System tab is only visible to network administrators and server administrators.
Here, administrators can manage users and user groups, manage permissions, view the available licenses and download new software.