If you are a new user of DISE Cloud, or need a walk-through of the basics, you have come to the right place.
This guide will help you with uploading content and sending it to your players via Portal in no time!
TABLE OF CONTENTS
Portal
First, we will give you a brief walkthrough of our cloud web UI, Portal.
For more information, also please see this page: Navigating DISE CX Portal
Landing page
This should be what you see when you browse to your given network address. Enter your username and password in to log in, the network should be pre-filled.

Please note, a Portal can have several networks and each network is private to its users. One network can have several users, which can be limited to certain actions or parts of the network.
Overview
Overview is the first tab in the left menu. Here you get an overview of the entire system with warnings if there is a problem.
This is also where you will find the publish option. To publish means that changes made in Portal are notified to players.

Players
Players are connected to the actual hardware. In this tab you get a list of players that are registered in Cloud.
You can arrange players in groups, or add players to the top level. If a player is experiencing problems the stripe next to the player will turn red. If the stripe is green, everything is working as it should! Click on a player to view more details, status and overall information

Playlists
To display content on your screens you need playlists. In this tab you can create, edit and manage all your playlists.

Layouts
Layouts lets you place playlists into zones or layers on the screen. It makes it possible to have your logotype on top of all content at all times or put the weather feed on one side of the screen.
All of this whilst still having DISE Movies, templates, videos or images playing on the rest of the screen.

Content library
The content library is where all your uploaded files are indexed. You can also upload new images, videos, webpages and PDF documents here.
(See the article Getting started with DISE Composer for information on how to upload presentations).
By selecting a file you can view more information about the object like size, upload date so on.

Schedule
Here you have the option to create your own flexible schedules.
Create schedules with multiple rules, for example if opening hours differ form weekdays to weekends. You can use these schedules on players or in playlists.

Reports
In the Reports tab monitor the health of all components as well as information about what content that has been shown on which screen and at what time.

My account
The My Account page allows the logged in user to see and change settings such as password, language, user details and various interface settings.


System
In the System tab, control and configure other users, manage permissions, licenses and download new versions.

Add and publish content
Next, how to get content displayed on your screens.
Create a playlist
- Choose playlists in the left menu and click on the plus symbol.
- Give your playlist a name (like coffee room), and enter a short description (optional).
- Click Save and your playlist should appear in the list below.
- Click on the playlist to add some content. In the new dialog, click on the plus symbol.
- A list of all the previously updated content should appear.
- Select the content you want to add (you can select several objects at once) and click Add.

You will also be given the option to upload new content from your computer.

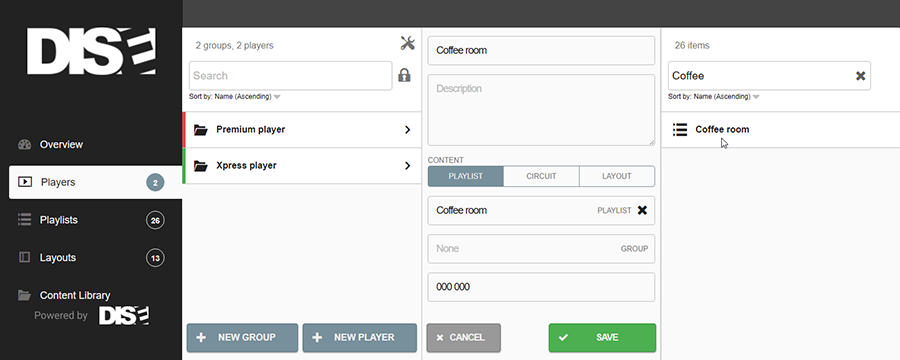
Assign a playlist to a player
Go to Players in the left menu and select your player (or player group).
Click Edit and a new dialog will appear. Click on the playlist field and select a playlist from the list. You can search for your playlist, or find it in the list.
Click the green Save button.

Add a player
Please skip this step if you already have all players you need and don’t need a new player.
Go to Players in the left menu and click on the plus symbol. In the dialog appearing, enter a name to give the player. A good tip is to name it to the location, for example “coffee room floor 2”. Here you will be given the option to add a playlist. Click on the
playlist field and a list will appear. You can search for your playlist, or find it in the list. Enter your 6-digit discovery code to connect to your hardware and click save. (If you don’t know how to obtain your discovery code, then have a look at our other installation guides).
Publish
Once any changes has been made you will get a notification about it at Overview.
Click on the Overview tab and go to Unpublished changes. Then click on either Publish all or press the padlock icon to publish the changes individually.

Congratulations on completing the Portal guide. Now you know how to create a playlist, set up a player and how to publish your content!